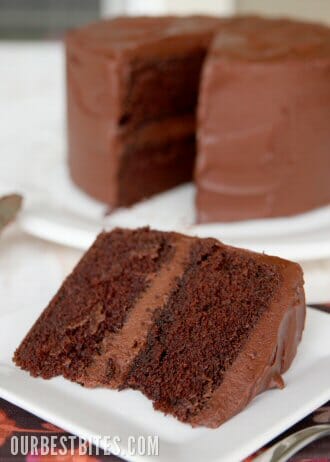
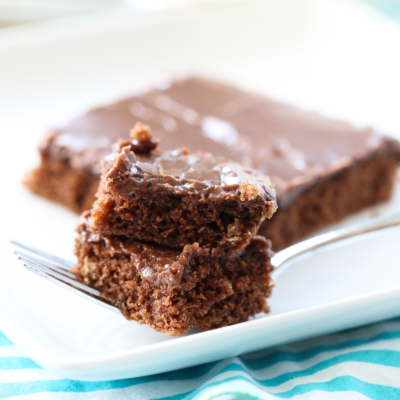
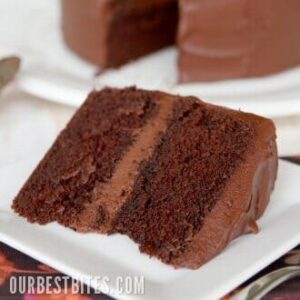
In case you missed it, This Old-Fashioned Chocolate Cake recipe goes with this chocolate frosting that I could eat plain from a bowl. The cake was on the cover of the “All-Time Best Recipes” Collector’s Edition from Cook’s Illustrated. My one piece of advice is that you take the time to follow all of the steps as written. What I’ve found with Cook’s Illustrated is that every minute step and process has a very specific purpose. These people try a recipe 428 different ways in order to get the best result- so I try not to stray too much- especially when it comes to baking. This is just a great, basic, perfectly chocolaty, moist, delicious old-fashioned cake, and I’d venture to say we all need one of those in our recipe collection!
Ingredients Needed
This is just a preview of ingredients and method, keep scrolling for full printable recipe.
Cake
- Unsalted butter – Always use real butter if you can!
- All-purpose flour
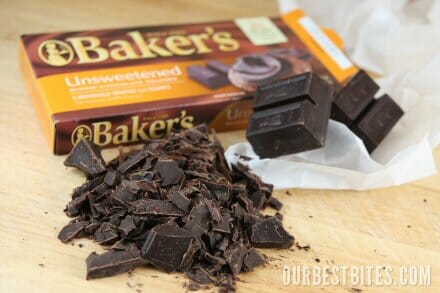
- Unsweetened chocolate – You can find unsweetened baking chocolate near the chocolate chips on the baking aisle, usually on the top shelf. If you are like me, this will instantly take you back to your childhood when you sneaked into the pantry and assumed it was semi-sweet. Mean Mom, very mean.
- Hot water – Hot water helps the chocolate “bloom,” resulting in a deeper, more intense chocolate flavor.
- Granulated sugar
- Baking soda
- Table salt
- Buttermilk – Buttermilk helps the cake retain moisture for a soft, tender crumb.
- Vanilla extract
- Eggs and egg yolks – The extra yolks add richness.
Old-Fashioned Chocolate Frosting
This is the frosting that goes with this cake, but see other options in the Frosting the Cake section below.
- Unsalted butter
- Granulated sugar
- Light corn syrup – Like Karo brand, found on the baking aisle, usually near other syrups.
- Vanilla extract
- Table salt
- Heavy cream
How to Make Old-Fashioned Chocolate Layer Cake
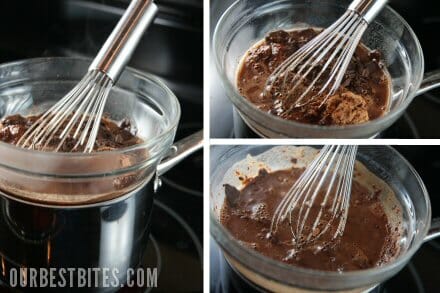
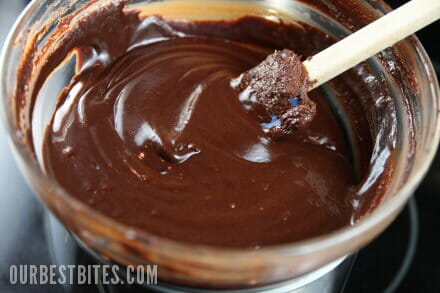
- First you’ll use a small glass or metal bowl to create a double boiler. This pudding-like mixture is one of the tricks to the great texture of the cake. We’ve got the melted chocolate in there, as well as some cocoa powder and hot water. It will start to thicken, and if you let it- it becomes quite thick. Then you add some sugar and it magically becomes soft and smooth and glossy. Set aside to cool.
- Next you’ll whisk up some eggs until they’re nice and frothy. The recipe calls for a stand mixer, but you can certainly make this with a hand mixer as well. In goes more sugar, because, well, we’re making a cake here people. And then that chocolate pudding-ish stuff And then some very soft butter. Seriously, soft. Not melted, just super duper soft.
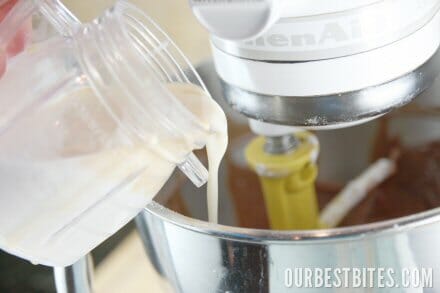
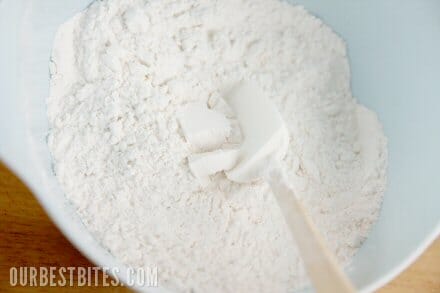
- Mix up those dry ingredients and alternate them with the buttermilk + vanilla. Yes, it’s important to alternate! I have a hunch there’s people who ignore that step in baking, and it definitely affects the outcome. If you dump everything in at once, you’re just making a big chocolate muffin.
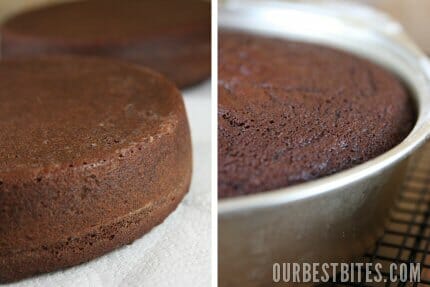
- In the batter goes to the pan and then onto the oven. Bake until a toothpick inserted near the center comes out with just a few moist crumbs.
- Cool the cake for a few minutes in their pans, then invert onto a wire rack, cool completely.
- While your cake is cooling, whip up your delicious Old-Fashioned Chocolate Frosting. Full details are in the recipe card below, or click on that link for step-by-step instructions with photos. See some other frosting options in the Frosting the Cake section below.
Frosting the Cake
I’m using this Old-Fashioned Chocolate Frosting, which is included on the recipe card below. Some other great options include: The Best Basic Chocolate Frosting, The Best Buttercream Frosting, Light and Airy Whipped Frosting, or Perfect Cupcake Frosting and Filling.
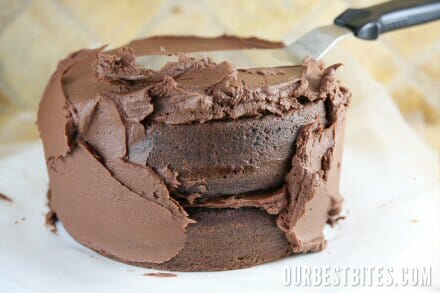
- Once those cakes are cooled you can frost. Place your first layer on your serving platter or cake plate and slather some frosting on top. Place the other layer on top and try to pretend it’s not just a huge whoopie pie wanting to be eaten right then and there.
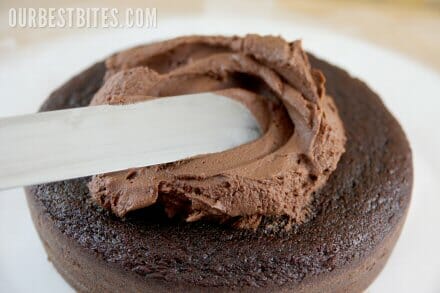
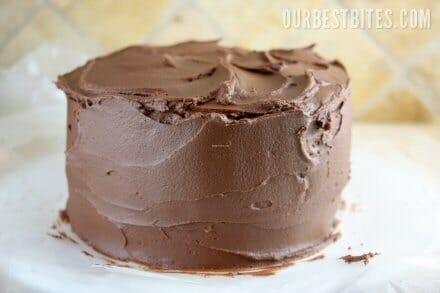
- From there, I don’t try to be pretty, I just start slathering. Place a large amount on top so that you always have something to spread around. This way you don’t really need a crumb coat. Try to get everything evenly coated- seriously, doesn’t have to be pretty yet! It’s more important that the frosting is evenly distributed.
- Once you are to that point, you can use an off-set spatula to gently smooth out the sides. It helps to run the spatula under very hot water first and dry it off before spreading.
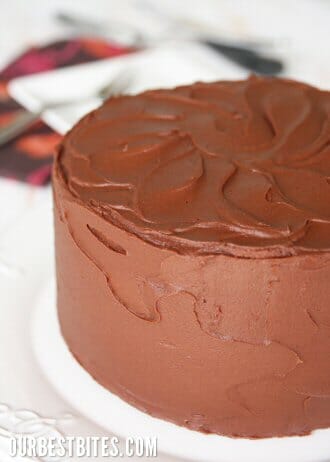
- For the top, I just use a spatula, or even a spoon, and make sort of a figure eight pattern to swirl it around. We’re going for sort of a casual elegance here. Shabby-Chic. Casual Friday, but with heels. Catch my drift?
Storing and Other Tips
- If you aren’t frosting right away, store finished, cooled cakes wrapped tightly in plastic at room temperature for up to 24 hours, until ready to frost.
- You can freeze the unfrosted layers as well. Wrap tightly in plastic (and then foil, for longer storage) and freeze until ready to frost. You can frost the cakes frozen and then allow everything to sit at room temperature to thaw before serving.
- Here’s a trick: When you are inverting a warm cake to a cooling rack, place a paper towel down first. It will still let the air circulate, but it prevents the cake from sticking to the rack.
Frequently Asked Questions
Of course! There are several frosting options listed in the Frosting the Cake section above, or you can use your own.
Definitely. Many baked goods are even better the second day after having a chance to rest. You can make the cake all the way through frosting it and store, covered, at room temp or in the fridge overnight. You can also make the cakes ahead of time, wrap tightly in plastic, and store at room temp or in the fridge or freezer until ready to frost.
You sure can. Freeze individual portions for treats later by wrapping slices tightly in plastic before freezing. If you need to freeze the whole cake to serve later, I recommend freezing the layers unfrosted, wrapped tightly in plastic. Make the frosting fresh, or the day before you plan to serve for the best presentation.
You should be able to, but I can’t advise on baking time because I’ve never done it! Keep an eye on it and test for doneness with a toothpick near the center of the cake when it looks firm and has lost some of it’s shine. The toothpick should come out with just a few moist crumbs.
Readers have reported great luck with cupcakes but I haven’t done it myself, so I cannot recommend baking time. This batter should make at least 24 cupcakes.
Old-Fashioned Chocolate Layer Cake
Ingredients
Cake
- 12 tablespoons unsalted butter (1 ½ sticks) very soft, plus extra for greasing pans
- 1 ¾ cups all-purpose flour plus extra for dusting pans
- 4 ounces unsweetened chocolate coarsley chopped
- ¼ cup dutch-processed cocoa powder
- ½ cup hot water
- 1 ¾ cup sugar
- 1 ½ teaspoons baking soda
- 1 teaspoon table salt
- 1 cup buttermilk
- 2 teaspoons vanilla extract
- 4 large eggs
- 2 egg yolks
Old-Fashioned Chocolate Frosting
- 16 ounces semisweet chocolate finely chopped (tiny bit over 2 ½ cups chocolate chips)
- 8 tablespoons unsalted butter
- ⅓ cup granulated sugar
- 2 tablespoons corn syrup
- 2 teaspoons vanilla extract
- ¼ teaspoon table salt
- 1 ¼ cups heavy cream cold
Instructions
Cake
- Adjust oven rack to middle position; heat to 350℉. Grease two 9-inch round by 2 inch high cake pans with butter; dust pans with flour and knock out excess.
- Combine chocolate, cocoa powder, and hot water in medium heatproof bowl; set bowl over saucepan containing 1 inch of simmering water and stir with rubber spatula until chocolate ins melted, about 2 minutes. Add ½ cup sugar to chocolate and stir until glossy, 1-2 minutes. Remove bowl from heat and set aside to cool.
- Whisk flour, baking soda, and salt in medium bowl. Combine buttermilk and vanilla in small bowl.
- In bowl of stand mixer fitted with whisk attachment, whisk eggs and yolks on medium-low speed until combined, about 10 seconds. Add remaining 1 ¼ cups sugar, increase speed to high, and whisk until fluffy and lightened in color, 2-3 minutes.
- Replace whisk with paddle attachment. Add cooled chocolate mixture to egg/sugar mixture and mix on medium speed until thoroughly incorporated, 30-45 seconds, pausing to scrape down sides of bowl with rubber spatula as needed. Add softened butter 1 tablespoon at a time, mixing about 10 seconds after each addition.
- Add about ⅓ of flour mixture; followed by half of buttermilk mixture mixing until incorporated after each addition (about 15 seconds). Repeat using half of remaining flour mixture and all of remaining buttermilk mixture (batter may appear separated). Scrape down sides of bowl and add remaining flour mixture; mix at medium low speed until batter is thoroughly combined, about 15 seconds.
- Remove bowl from mixer and fold batter once or twice with rubber spatula to incorporate any remaining flour. Divide batter evenly between prepared cake pans; smooth batter to edges of pan with spatula.
- Bake cakes until toothpick inserted into center comes out with a few crumbs attached, 25-30minutes. Cool cakes in pans 15 minutes, then invert onto wire rack. Cool cakes to room temperature before frosting, 45-60 minutes.
Frosting
- Melt chocolate in a heatproof bowl over a saucepan of simmering water, stirring occasionally, until smooth and glossy. Remove from heat and set aside.
- Empty the water from the saucepan and return the pan to the stove over medium-low heat. Add the butter and melt. Increase the heat to medium and add the sugar, corn syrup, vanilla, and salt and stir with a silicone spatula until the sugar is dissolved, about 4-5 minutes.
- Add the melted chocolate, the butter and sugar mixture, and the cream to the bowl of a stand mixer and stir thoroughly to combine.
- Place the bowl over an ice bath and stir constantly with a silicone spatula until the mixture is thick and begins to harden against the sides of the bowl, about 1-2 minutes (frosting should be about 70℉ at this point).
- Place the bowl on the stand mixer fitted with a paddle attachment and beat on medium-high speed until frosting is fluffy, about 1-2 minutes. Stir with silicone spatula until completely smooth.
- Frost cooled cakes.
Notes
- Don’t make the frosting until the cakes are cooled, and use the frosting as soon as it is ready. If the frosting gets too stiff to spread easily, wrap the mixer bowl with a towel soaked in hot water and mix on low speed until the frosting is creamy and smooth. Refrigerated leftover cake should sit at room temperature before serving until the frosting softens.
- If you aren’t frosting right away, store finished, cooled cakes wrapped tightly in plastic at room temperature for up to 24 hours, until ready to frost.
- You can freeze the unfrosted layers as well. Wrap tightly in plastic (and then foil, for longer storage) and freeze until ready to frost. You can frost the cakes frozen and then allow everything to sit at room temperature to thaw before serving.
- Here’s a trick: When you are inverting a warm cake to a cooling rack, place a paper towel down first. It will still let the air circulate, but it prevents the cake from sticking to the rack.
- Further Old-Fashioned Chocolate Frosting instructions and photos found here.








Questions & Reviews
I can’t wait to try this recipe! Could I substitute boiling coffee for the boiling water? I heard coffee really brings out the chocolate flavor. I love chocolate.
This looks awesome. One question: how long does it take to make this cake — in total?
I just tried this recipe and it was delicious and mouthwatering.
Divine! Made it for a party and it was a huge hit. Five stars.
You know this is going to be my birthday cake, right? This tasted AMAZING!!
What if I only have semi-sweet baking chocolate? Should I use less sugar?
No, sugar isn’t just for flavor, it’s for a complex baking process and adjusting those amounts will change the result of the cake. I’d just grab the right chocolate, or use semisweet instead (knowing it will be a bit sweeter.)
So I’ve made this cake about 5 times, and I think only once it hasn’t collapsed too badly. All the other times it has collapse some, and most of the times it has collapsed too much to be salvageable. What is the deal? I don’t open the oven in the middle of it baking, I have used fresh baking soda, and I try to be super careful when taking them out of the oven. It’s ALWAYS when I take them out and place them on the counter that they slowly deflate. Any ideas? I love this cake so much with the frosting, but it’s depressing when it doesn’t turn out!
Made this yesterday and topped it with chocolate ganache and decorated it with Italian Meringue Frosting (Peanut Butter Flavour)!!! Heaven on earth!
I made this last night. The cake came out dense and soft and the frosting very soft and creamy. I first i thought that the old “hershey cake” had it beat. But this cake, the chocolate taste sorta expands in your mouth while eating. And the icing is light smooth and chocolatey. My hubby gave it 2 thumbs up. It’s a different chocolate taste in a good way.
Made this cake last night for a work event. Excellent choice. Huge his with my chocolate-loving co-workers! Will definitely use this recipe again!