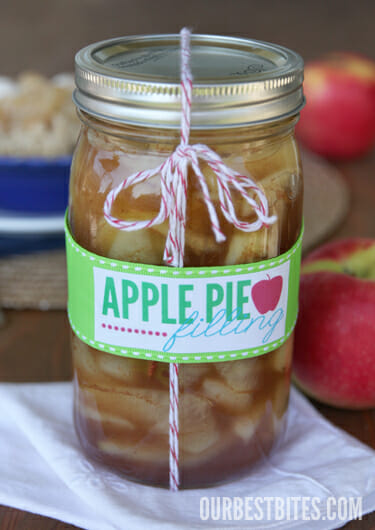
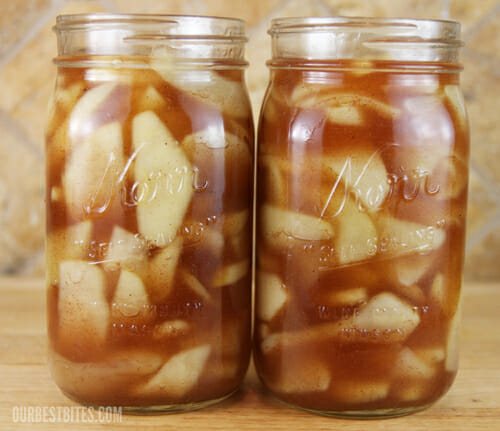
Have I ever told you how much I love fall time? I love fall. And about this time every year I start getting antsy for it. So it was a super great move for me to make this recipe because it was better than any candle, wax melt, or scented oil I own. The smell of fresh cut apples simmering in cinnamon and nutmeg? Heaven. I just ignored the fact that it was 96° outside. You can make this recipe to can in jars (read our Introduction to Canning and Preserving by clicking here) or pop batches in your freezer. It’s fun to have on hand for quick desserts like apple pie, apple crisp, apple turnovers, and it’s great on waffles, pancakes and ice cream too. It also makes a super cute gift for the holidays or for a hostess gift or new neighbor gift, etc.
If you’re new to canning, read our Introduction to Home Canning and Preserving post first!
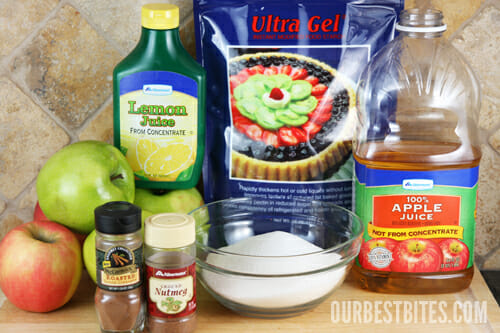
Ingredients and Equipment Needed
This is just a preview of ingredients and method, keep scrolling for full printable recipe.
Ingredients
- Fresh apples – Any variety that is crisp and tart works well. If you do not use a crisp apple, your filling will get mushy when you go to use it later!
- Granulated sugar – You can also use brown sugar for a darker, richer, caramel-like flavor.
- Ultra Gel or Clear Jel – See the box below for specific notes on these thickeners. Do not use cornstarch or tapioca if you plan to can your filling. If using immediately or freezing, then those options are ok.
- Ground cinnamon
- Ground nutmeg
- Apple juice
- Bottled lemon juice – Acid from the lemon juice is what keeps this recipe safe for canning. Since fresh lemons can vary in acidity, the safest best for consistency is always bottled lemon juice. If you are using your filling fresh or plan to freeze it, fresh lemon juice will be just fine. I would not skip it all together, as the citric acid helps preserve the color and flavor of the apples.
A Note About Thickeners
I spent a better part of a Wednesday pulling my hair out and cursing driving around town in search of, and making phone call after phone call trying to get information about thickeners! A huge thanks to my friend/canning mentor Britanie for helping me figure out what the heck to use; I must have texted her 47 times this week. Thanks to her, and my new BFF at the extension office, I can sort of pretend I know what I’m talking about around here. It can be confusing because I noticed recipes call for different things depending on when they were written, and I know the #1 rule of canning is to not make substitutions or changes to a recipe that has been tested for canning.
I noticed a lot of older recipes call for corn starch, which is not recommended by the USDA for safe canning (it can make the filling too thick at the start for heat to penetrate and kill spoilage organisms and then can also break down during the canning process, leaving the final filling runny). Then I found lots of recipes calling for ClearJel, but I couldn’t find ClearJel anywhere. I finally got a hold of someone at my local extension service (I seriously love those people!) and she explained that the only products that have been verified after testing are Ultra Gel and Thick Gel. Ultra Gel is just a modified corn starch that’s safe and effective for use in canning (as well as tons of other things). She said ClearJel is the same thing as Ultra Gel, it’s just changed names. I found Ultra Gel in several local canning supply stores, so if you find a well stocked location you should be able to easily find it. You should also be able to find it at cooking stores. If not, then you can order it on-line, but that’s what you should be using. It’s not the same thing as the little boxes of “Sure-Gel” you get to make jam.
If you are a Boise/Meridian local, I bought mine at Karcher Ranch Market in Nampa. And I’ve been told in Utah it’s at Orson Gygi. I hope that’s helpful to someone else since it took me a while to figure out!
Equipment
- Water bath canner – This is the simplest canning method and it’s great for beginners! The water bath method involves placing jars of prepared food into simmering water for a specified amount of time. It’s basically just a big pot. Since this recipe is small, I actually just used my stock pot. As long as the jars can be fully submerged, you’re good.
- Canning funnel – Optional, but helpful! A canning funnel helps keep your jars mess-free while filling.
- Apple peeler/slicer/corer – Again, optional, but especially helpful if you’re making a large batch! Just run the apples through and then, once the are spiral cut, just cut the whole apple right in half to get perfect slices.
How to Make Apple Pie Filling
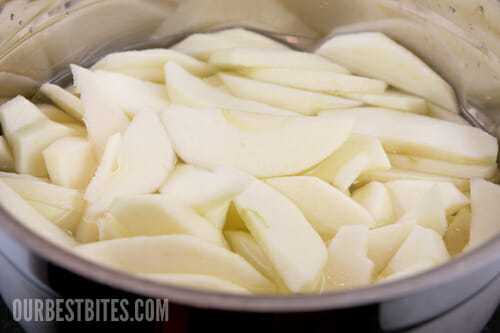
- First you’ll prep your apples. I recommend having a bowl of cold water with some lemon juice in it to store them until the next step. This will prevent premature browning.
- Next those apples will get a quick blanch in boiling water. You’ll want to measure your apples after blanching, as they will reduce quite a bit. Those get set aside while you make your sauce.
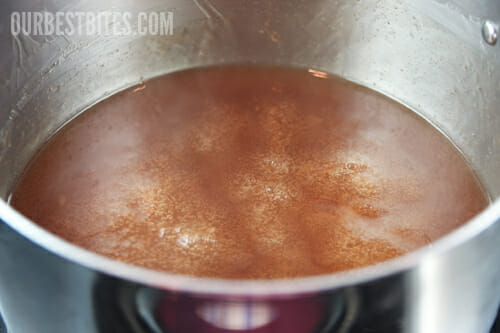
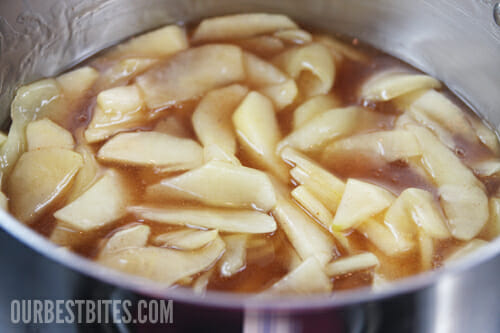
- Sugar, Ultra Gel, and fall spices get simmered briefly with apple juice and water. Then you’ll add your lemon juice and apples.
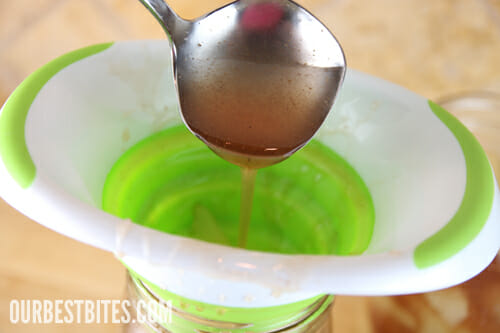
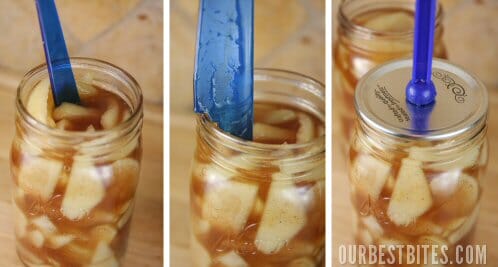
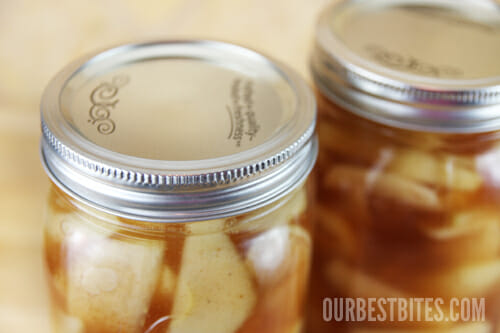
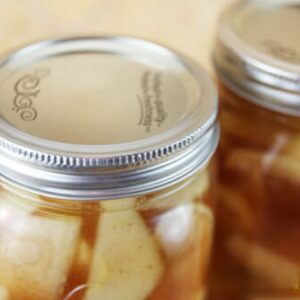
- That mixture gets transferred to your jars. Then you’ll just pop those lids on and process the jars in your water bath canner.
- Alternately, you can let the mixture cool and then freeze. Or use some right away, up to you!
Storing and Other Tips
- Enjoy your canned filling within 1 year. While it should still be safe to eat after that, the apples may gradually lose color, texture, and flavor.
- Once you open a can, refrigerate any unused filling and use within 5-7 days.
- For frozen filling, enjoy within 3 months for best results.
Ways to Enjoy Your Apple Pie Filling
Apple Pie
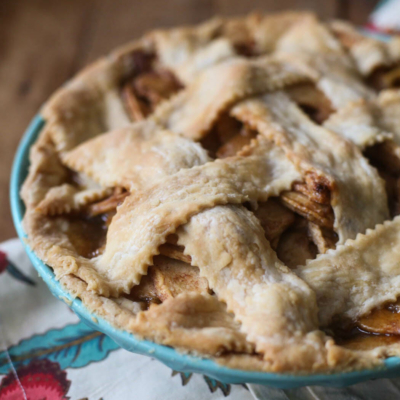
- From the Can: Whip up a double crust using this Apple Pie recipe, or use a store bought one. Line your pie plate, fill with a can of filling (approximately 4 cups), top with your second crust, add some vents, and bake. With the above crust, I bake at 375°F for approximately 45 minutes, or until the crust is golden and the filling is bubbling.
- From Frozen – You have a few options with frozen filling!
- Thaw – Thaw the filling and use as outlined above.
- Freeze in a pie plate – Place approximately 4 cups of filling in a gallon sized freezer storage bag and lay in a pie plate. After the filling is frozen, you can remove the pie plate. When you’re ready to bake, prepare your pie crust and pop your frozen filling right in. Cover with a second crust, vent, and bake. Expect the pie to bake for 20-30 minutes beyond the normal baking time. If the crust is getting too brown, cover the edges or top loosely with foil and continue baking until filling is bubbling from the vents.
- Freeze a whole pie – Prep your whole pie, with a double crust and vents. Wrap tightly in plastic and then foil. Freeze for up to 3 months. When ready to bake, follow the directions above, but expect to add and additional 20-30 minutes to the baking time.
Apple Crisp
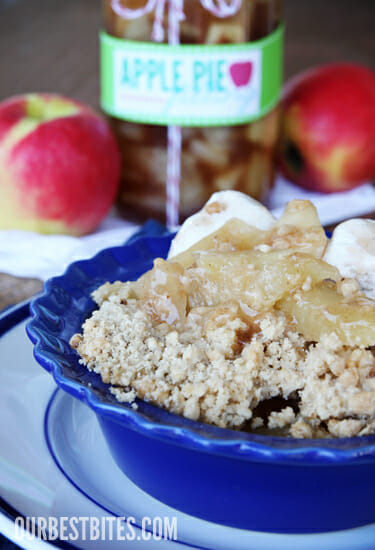
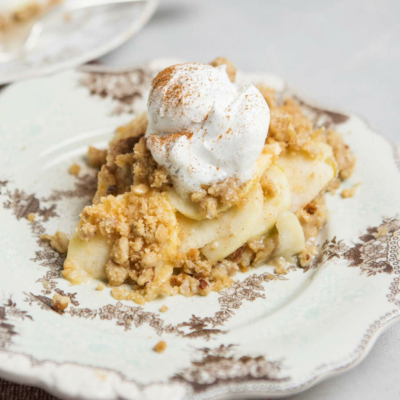
- Dump your filling into a pan and top with Classic Apple Crisp topping, then bake until golden and bubbly.
As a Topping
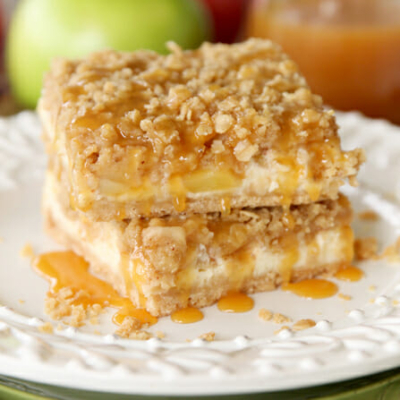
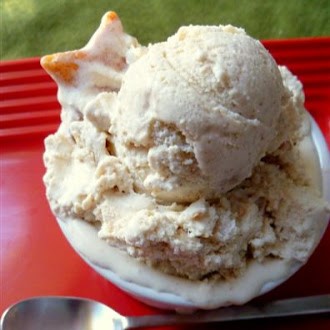
- You can use this filling just like you would canned pie filling from the store. It’s delicious on waffles and pancakes, or served over cheesecake or ice cream.
Frequently Asked Questions
If you are canning, do not use any of these. See the Note on Thickeners in the Ingredient section above. These are not safe for canning and/or will affect the consistency negatively.
If you are using the filling fresh or freezing, cornstarch or tapioca are ok, but pectin will not work.
You can, just make sure they are uniform sizes. Note that very thin slices may overcook between canning and baking later and may become mushy. Slices about 1/4-1/2 inches thick work well. Cubes or chunks will also work.
Canning is tricky and food safety should be taken seriously. This recipe is designed specifically for apples. I would not substitute another fruit if you are going to be canning. If you are going to eat the filling fresh or freeze it for later, feel free to experiment with other fruits!
This recipe can be safely canned in pint or quart jars, according to the USDA/National Center for Home Food Preservation. Processing time remains the same. Do not use jars any larger than that, as they are not approved as a safe option for home-canned pie filling.
Yes, if you’re canning! This step removes air and excess liquid from the apples, which is a necessary step in reaching to correct consistency and for canning.
If you’re not canning your filling it’s ok to skip this step, although your filling might be a little thinner after your pies bake.
Apple Pie Filling (For Canning or Freezing)
Ingredients
- 6 quarts fresh apples (15-18 pounds, or 24-30 apples.) Use firm, crisp apples. If apples lack tartness, use an additional ¼ cup of lemon juice to the sauce for each 6 quarts of slices.
- 5 ½ cups granulated sugar
- 1 ½ cups Ultra Gel or Clear Jel
- 1 tablespoon ground cinnamon
- 1 teaspoon ground nutmeg
- 2 ½ cups cold water
- 5 cups Apple Juice
- ¾ cups bottled lemon juice plus extra, to prevent browning while slicing
Instructions
- Wash, peel, and core apples. Prepare slices ¼-½ inches wide and place in cold water containing ¼ cup lemon juice for every 4 cups water (or water containing ascorbic acid) to prevent browning.
- Place 6 cups of apples at a time in 1 gallon of boiling water. Boil each batch 1 minute after the water returns to a boil. Drain, but keep heated fruit in a covered bowl or pot.
- Combine sugar, spices, Ultra Gel, and spices in a large kettle with water and apple juice. Stir and cook on medium high heat until mixture thickens and begins to bubble. Add lemon juice and boil 1 minute, stirring constantly. Fold in drained apple slices immediately and fill jars with mixture without delay, leaving 1 inch headspace. Adjust lids and process immediately in a waterbath according to the recommendations below.
- Processing time for pint or quart size jars: 0-1000 ft: 25 min, 1001-3000 ft:30 3001-6000 ft: 30 mins Above 6000 ft: 40 mins.
- Freezer Instructions: Alternately this recipe can be placed in freezer bags and frozen for several months. Place approximately 4 cups apple mixture to fill one standard size pie.
Notes
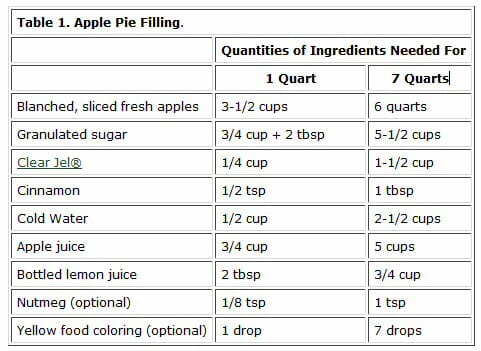
- Make More or Less: If you’d like to make a larger or smaller batch, adjust the yield on the recipe card before printing, or use the chart below.
- To Use in a Pie: Simply prepare your crust as normal, fill the pie with a quart of apple pie filling, cover with a top crust, and bake at 450°F for 20 minutes, then reduce to 375°F and bake 25-35 minutes more. Crust should be golden and the filling should be bubbling through the vents in the crust.
- If Your Filling is Frozen: Thaw overnight in the fridge before using in a pie.
- Freeze and Assemble a Whole Pie: Allow filling to cool completely. Assemble your pie in a freezer-safe pie plate with a bottom crust, approximately 4 cups of filling, and a top crust with vents. Wrap well in plastic then foil and freezer for up to 3 months. Bake directly from frozen, adding about 20-30 minutes to the baking time, until crust is deeply golden and filling is bubbling.








Questions & Reviews
I just did basically the same thing with peaches for peach pie filling. I love peach pie. I has to order more clear jell because I used all mine while making it. I found a good deal at The Prepared Pantry. I bought it from them through Amazon. It is about 4 cups worth and was only like $4.00. Of course shipping was more than the product cost, but when you live in the stix and you can’t get it locally that is what you have to deal with. Thanks for canning week. I love to can and hope some will start who haven’t tried it before.
We purchase this farm and have LOTS & LOTS of apple trees and now I will make Apple pie filling my hubby will be so proud!! Thanks for sharing.
we have a heirloom seed place in oregon that carries clear gel. might want to try some places like that. also do you have to blanch the apples? and do you know why they say only clear gel is okay? because i have been using flour and cornstarch for years and i havent had a problem (that i know of).
Heidi, here is the “official” explanation (by someone who, unlike me, knows what they’re talking about 🙂
“Canning apple pie filling using tapioca or cornstarch as the thickener (outdated method.) Why is this risky? Botulism is not a major risk here because the high acid content of the apple filling. However, using cornstarch or tapioca may cause the filling to be too thick for the heat to penetrate and kill spoilage organisms throughout the product—a food safety issue. Cornstarch will break down during the canning process. .
Current recommendations: Clearjel®/Ultra Gel is the only thickening agent approved by the USDA for canning. It is a modified waxy food starch producing a smooth, heavy-bodied, gel-like product. Canned products retain a smooth texture with no liquid separation or curdling. Cornstarch and tapioca break down during the canning process causing the filling to be runny. Another option is to can the pie filling without any starch and then thicken it with tapioca or cornstarch before putting it in the pie shell.” – U of M Food Safety and Research Dept.
The problem with not blanching the apples is that the liquid inside of them will come out during the canning process and may be more than what you’ve accounted for, or less. A quick cook, like blanching in water or steaming quick in the microwave will make your liquid to solids balance so you get a more consistent end product than if you use raw. 🙂
You can find Clear Jel through Alison’s Pantry. You may be able to order it online at http://www.alisonspantry.com. I have found Alison’s Pantry to be the cheapest place to buy Clear Jel. To see if there is a rep near you, just visit their website. They are a Utah based company, but deliver to Nevada, Arizona, Wyoming, Colorado and Idaho.
Thanks for a great recipe. Love your sight.
Thanks for all the great canning recipes! I laughed out loud when I looked at the labels and I said “oh those are cute, how did she make those?” and then you stated on your blog that you knew we were going to ask. 🙂
I love fall also! I can’t wait to start making things with apples, pears, pumpkins, squash and others. YUM!
I’m a mind-reader! lol
My 3 year old was looking at the computer as I was reading this and in his sweet 3 year old voice said, “Mommy…what is that??? It looks NUMMY!!” 🙂
We’re not pig fans of pie at my house, but we love dump cake and use lots of pie filling! Thanks!
giggle. “pig fans”
What a great idea to have this delicious recipe available not to fill a pie, but to put on a waffle or do whatever one chooses. Never would have even thought of it. Thanks for the idea.
It’s also really fun to bake sugar cookies and put a scoop of warm pie filling on them. Easy mini apple pie. My kids love them. 🙂
Hi you wonderful ladies at OBB! I recently stumbled across your spectacular blog about 5 days ago and have spent all my free time since catching up on several years worth of your posts! I LOVE your taste/style/presentation and all around humorous approach to living realistically! And I don’t know how many times i’ve laughed out loud and thought to myself how much you both sound like myself. 🙂 Thanks for your dedication, I’ll be looking for your cookbook at Barnes and Nobel soon!
Oh great-I am looking forward to doing more apple pie filling this year and will try this recipe, it is different than mine! Now I will hunt done some Ultra/Clear Gel. Wondering where to get it in Pocatello, Idaho?!